How to Setup the CI/CD pipeline with Jenkins and GitHub for a Node Js application
Here's a step-by-step guide to setting up the CI/CD pipeline using Jenkins and GitHub for a Node JS application, triggering code deployment for both Public and Private GitHub Repositories.
What is Jenkins?
Jenkins is an open-source automation tool used for continuous integration and delivery. We can set up a ci/cd pipeline for us. It's free and easy to use and can be installed on a server or local host. It's primarily written in Java, making it robust, scalable, and flexible to use with different platforms like Windows, Linux, and Mac.
Jenkins is the most common open-source tool used in most CI/CD pipelines with DevOps methods.
What is GitHub?
GitHub is a cloud service that uses Git and is backed by Microsoft. It gives us the power to store, maintain the codebase, and collaborate with team members Worldwide. It has a paid version, but the free version is enough for most cases. It works to link a central server where all the team members can push and pull codes, it syncs our local git Repositories with the GitHub server.
Steps for setting up CI/CD for a Node Js application
Now we will use the Jenkins and GitHub combination to auto-deploy a Node JS application in production. Will trigger a build when the code is pushed to GitHub and all the work will be done by Jenkins to build and run the application.
Steps for setting up CI/CD for a Node Js application
- Installing Java
- Install Jenkins on a Ubuntu Server
- Setting up PM2 and Apache Webserver for Node JS
- Accessing GitHub Public Repositories
- Make access token for securely accessing GitHub Private Repositories
- Triggering automated build when code is pushed to a GitHub Repo
- Installing and building Node JS application with npm
- Running the Node Js application with pm2
- Setting up Apache2 reverse proxy for connecting our node js app with a domain
- Install Jenkins on a Ubuntu Server
Here we will use a Ubuntu Server. First, you must log in as a root user using SSH and follow these commands to install Jenkins.
Installing Java
Jenkins needs Java to run, so if you don't have Java installed then install it using these commands
sudo apt update
java -version
sudo apt install default-jre
sudo apt install default-jdk
java -version
Installing Jenkins
Once you have Java installed then follow these commands to install Jenkins.
sudo wget -O /usr/share/keyrings/jenkins-keyring.asc \
https://pkg.jenkins.io/debian-stable/jenkins.io-2023.key
echo "deb [signed-by=/usr/share/keyrings/jenkins-keyring.asc]" \
https://pkg.jenkins.io/debian-stable binary/ | sudo tee \
/etc/apt/sources.list.d/jenkins.list > /dev/null
sudo apt-get update
sudo apt-get install jenkins
Install Jenkins
sudo systemctl enable jenkinsCheck Jenkins Status
sudo systemctl status jenkins
Allow Jenkins in the ufw firewall
Set up the ufw firewall to allow Jenkins to run. By default, Jenkins runs on port 8080, so we need to allow it.
sudo ufw status
sudo ufw allow OpenSSH
sudo ufw allow 8080 #jenkins runs on 8080 b default
sudo ufw enable
Now open your server it 8080 port http://<ip>:8080/, you should see jenkins web interface
Initial setup for Jenkins
It will prompt you to enter the initial password, which you can enter from the following command and continue with the recommended installation.
sudo cat /var/lib/jenkins/secrets/initialAdminPassword
Setting up PM2 and Apache Webserver for Node JS
Here we will install PM2 for node js and configure the Apache webserver and ports for serving the node js application.
Install Node Js
# installs nvm (Node Version Manager)
curl -o- https://raw.githubusercontent.com/nvm-sh/nvm/v0.40.0/install.sh | bash

# download and install Node.js (you may need to restart the terminal)
nvm install 20

# verifies the right Node.js version is in the environment
node -v # should print `v20.18.0`

# verifies the right npm version is in the environment
npm -v # should print `10.8.2`
Install PM 2
sudo npm install pm2 -g
Install Apache 2 and Configure Reverse Proxy
sudo apt install apache2
sudo ufw app info "Apache Full"

sudo ufw allow OpenSSH
sudo ufw allow "Apache Full"

sudo ufw enable

sudo ufw app list
Now we have installed apache2 and allowed it in port 80.
Create a conf file for your node-js-app by using
sudo cp /etc/apache2/sites-available/000-default.conf /etc/apache2/sites-available/node-js-app.conf
Now use nano editor to edit the conf file for reverse proxy
sudo nano /etc/apache2/sites-available/node-js-app.conf
Now the conf file should look like this yourdomain.com and 3000 add your domain name and port, Also you need to add the A record pointing to your domain and www in the DNS. After that, your node js app will connected to your domain.
Comment out DocumentRoot /var/www/html or remove, its not needed as we are using the reverse proxy.
<VirtualHost *:80>
        # The ServerName directive sets the request scheme, hostname and port that
        # the server uses to identify itself. This is used when creating
        # redirection URLs. In the context of virtual hosts, the ServerName
        # specifies what hostname must appear in the request's Host: header to
        # match this virtual host. For the default virtual host (this file) this
        # value is not decisive as it is used as a last resort host regardless.
        # However, you must set it for any further virtual host explicitly.
        #ServerName www.example.com

        ServerAdmin webmaster@localhost
        ServerName yourdomain.com
        ServerAlias www.yourdomain.com

        ProxyPass / http://127.0.0.1:3000/
        ProxyPassReverse / http://127.0.0.1:3000/

        #DocumentRoot /var/www/html

        # Available loglevels: trace8, ..., trace1, debug, info, notice, warn,
        # error, crit, alert, emerg.
        # It is also possible to configure the loglevel for particular
        # modules, e.g.
        #LogLevel info ssl:warn

        ErrorLog ${APACHE_LOG_DIR}/error.log
        CustomLog ${APACHE_LOG_DIR}/access.log combined

        # For most configuration files from conf-available/, which are
        # enabled or disabled at a global level, it is possible to
        # include a line for only one particular virtual host. For example the
        # following line enables the CGI configuration for this host only
        # after it has been globally disabled with "a2disconf".
        #Include conf-available/serve-cgi-bin.conf
</VirtualHost>

# vim: syntax=apache ts=4 sw=4 sts=4 sr noet
How the Reverse Proxy works for Apache, PM2, and Node JS
See we plan to run the app in the 3000 port, by which we can access the node js app in http://<server_ip>:3000, The apache webserver runs on port 80 and we are mapping records for the domain, and in apache config passing the proxy to 300 port. So that it app will be available with the domain.
Access GitHub Repo.
GitHub gives us two types of repositories, public and private. For the public, we don't need any special setup. But for private we need to generate a Personal Access Token.
Open GitHub and create a token by adding a Note, choose an Expiration time select the scopes(choose repo), then generate the token.
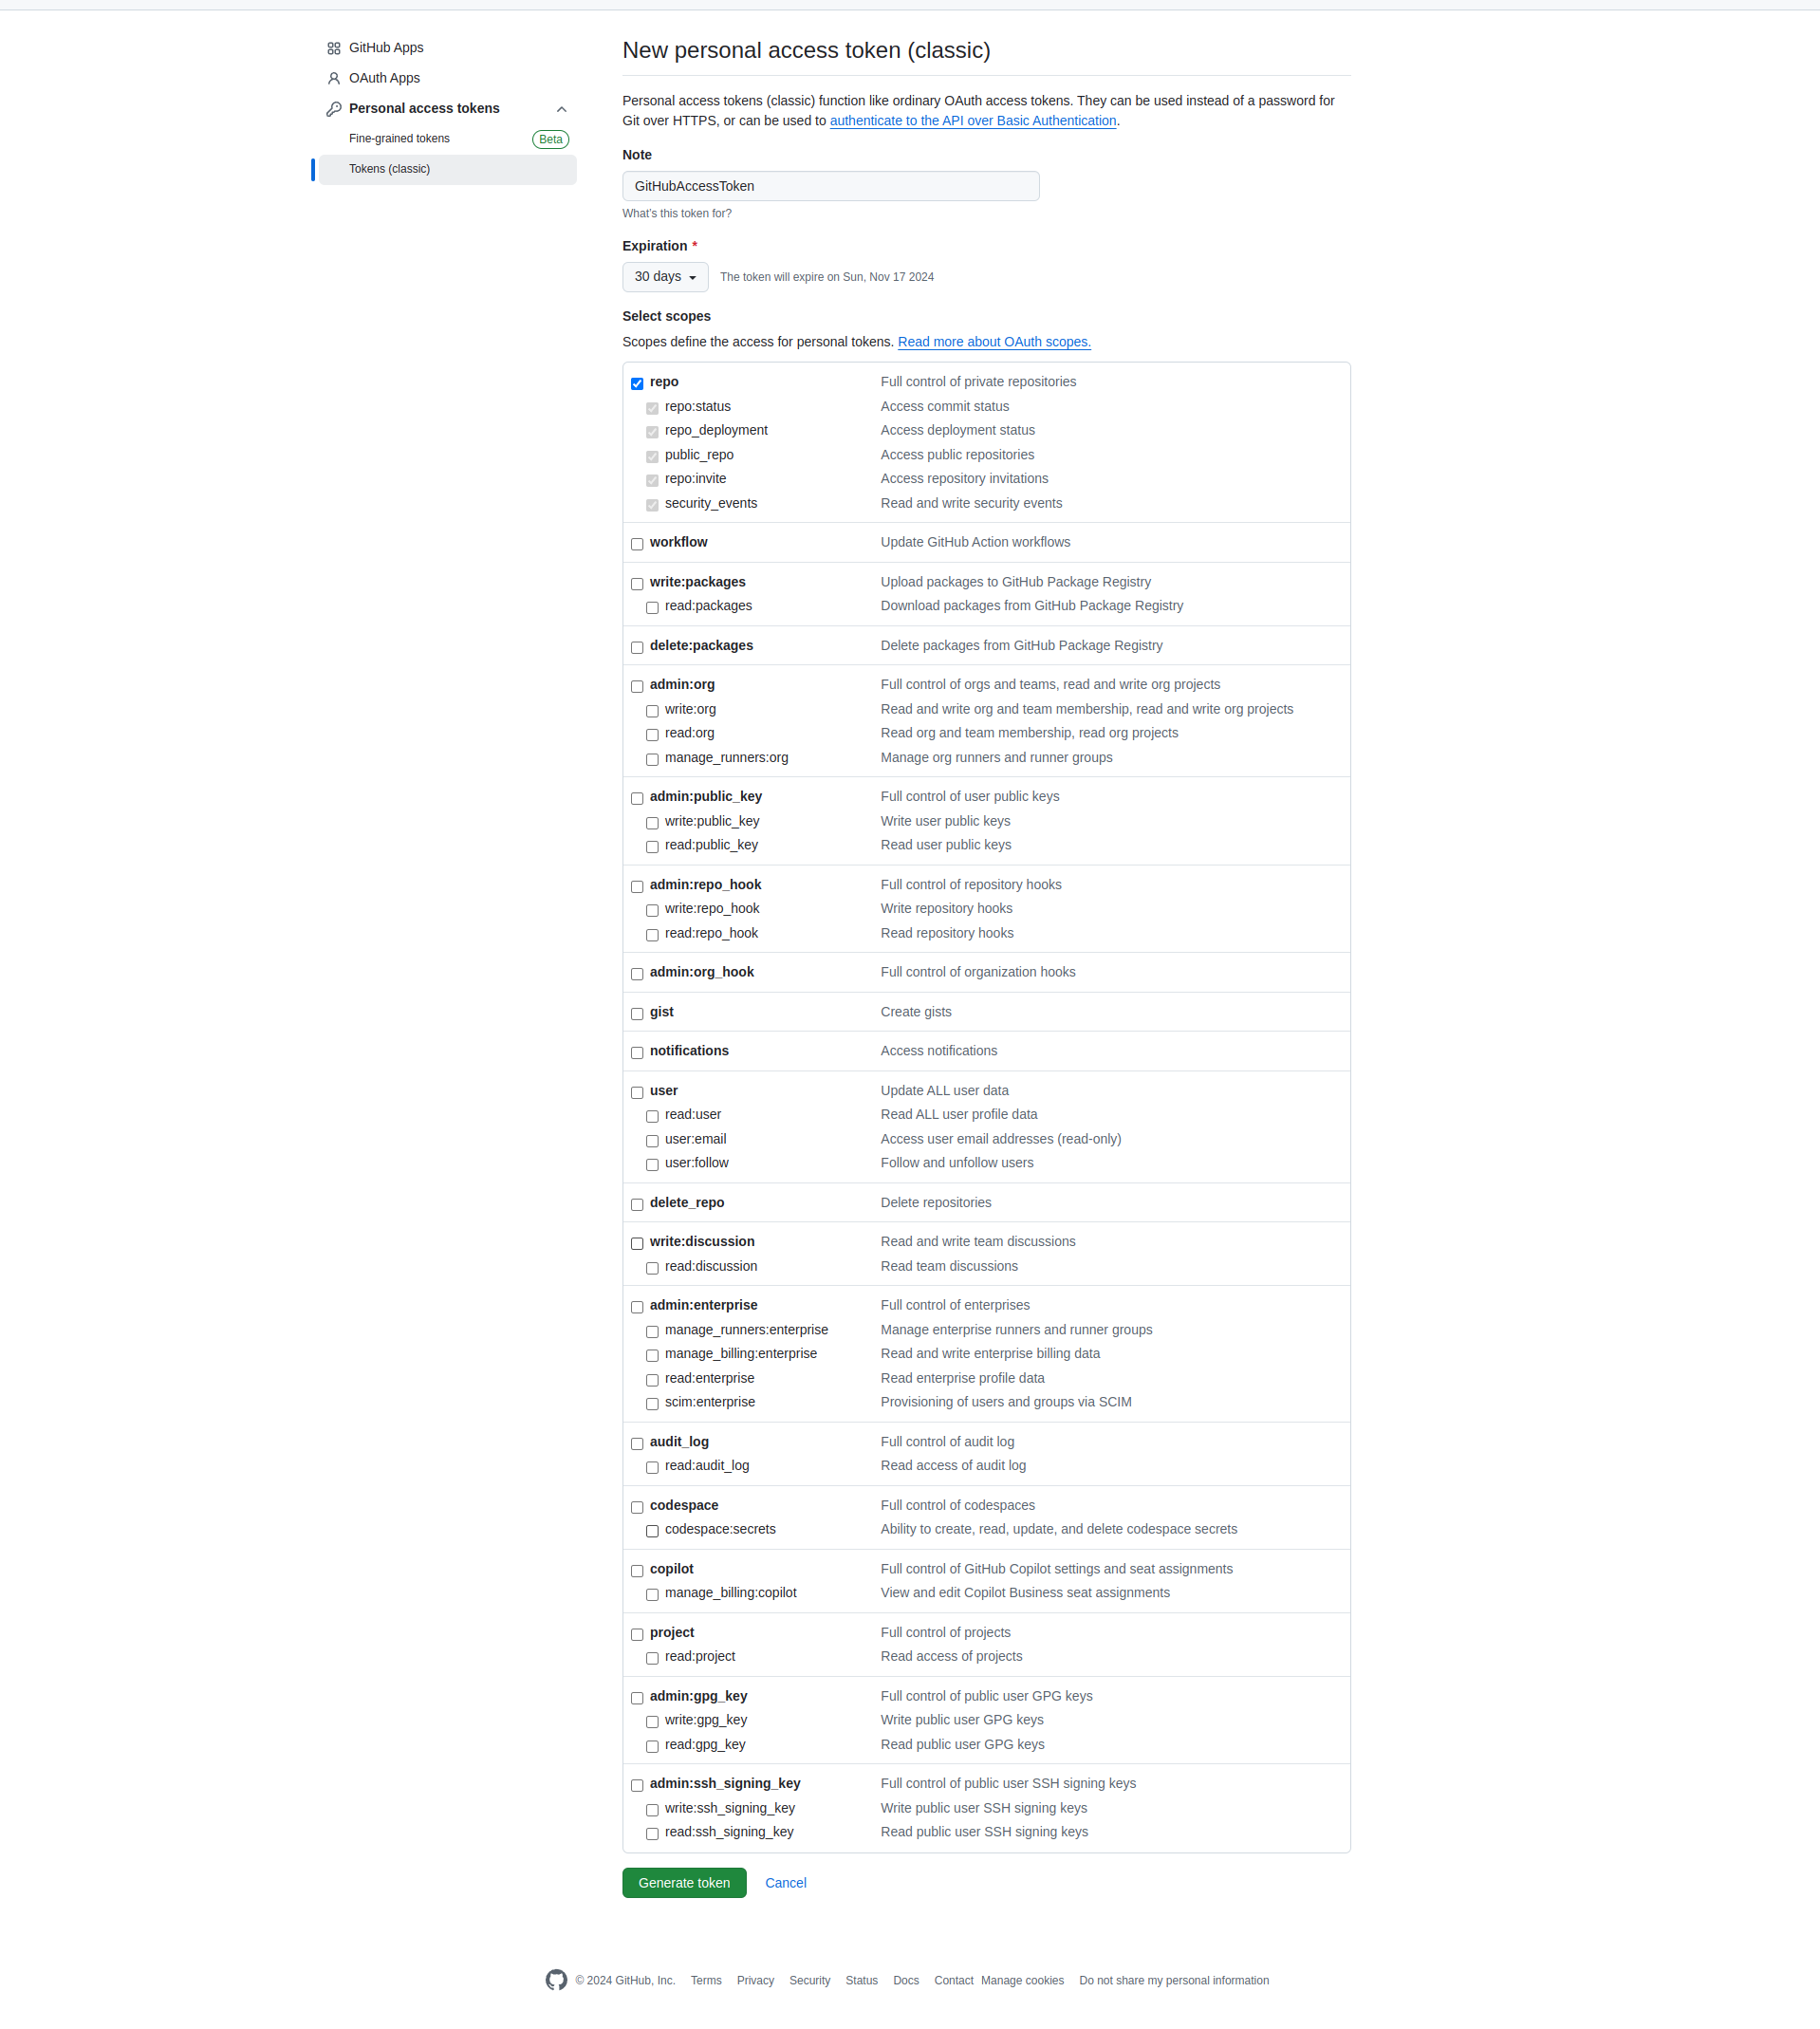
Generate and copy the token, it will be available for once to copy and store securely. We need this to access the GitHub Private repo in Jenkins.
Creating Jenkins Job
Once you have Jenkins installed and Generated the GitHub token, log in to the Jenkins dashboard, and click on the New item. Here name the Job and choose a freestyle project.
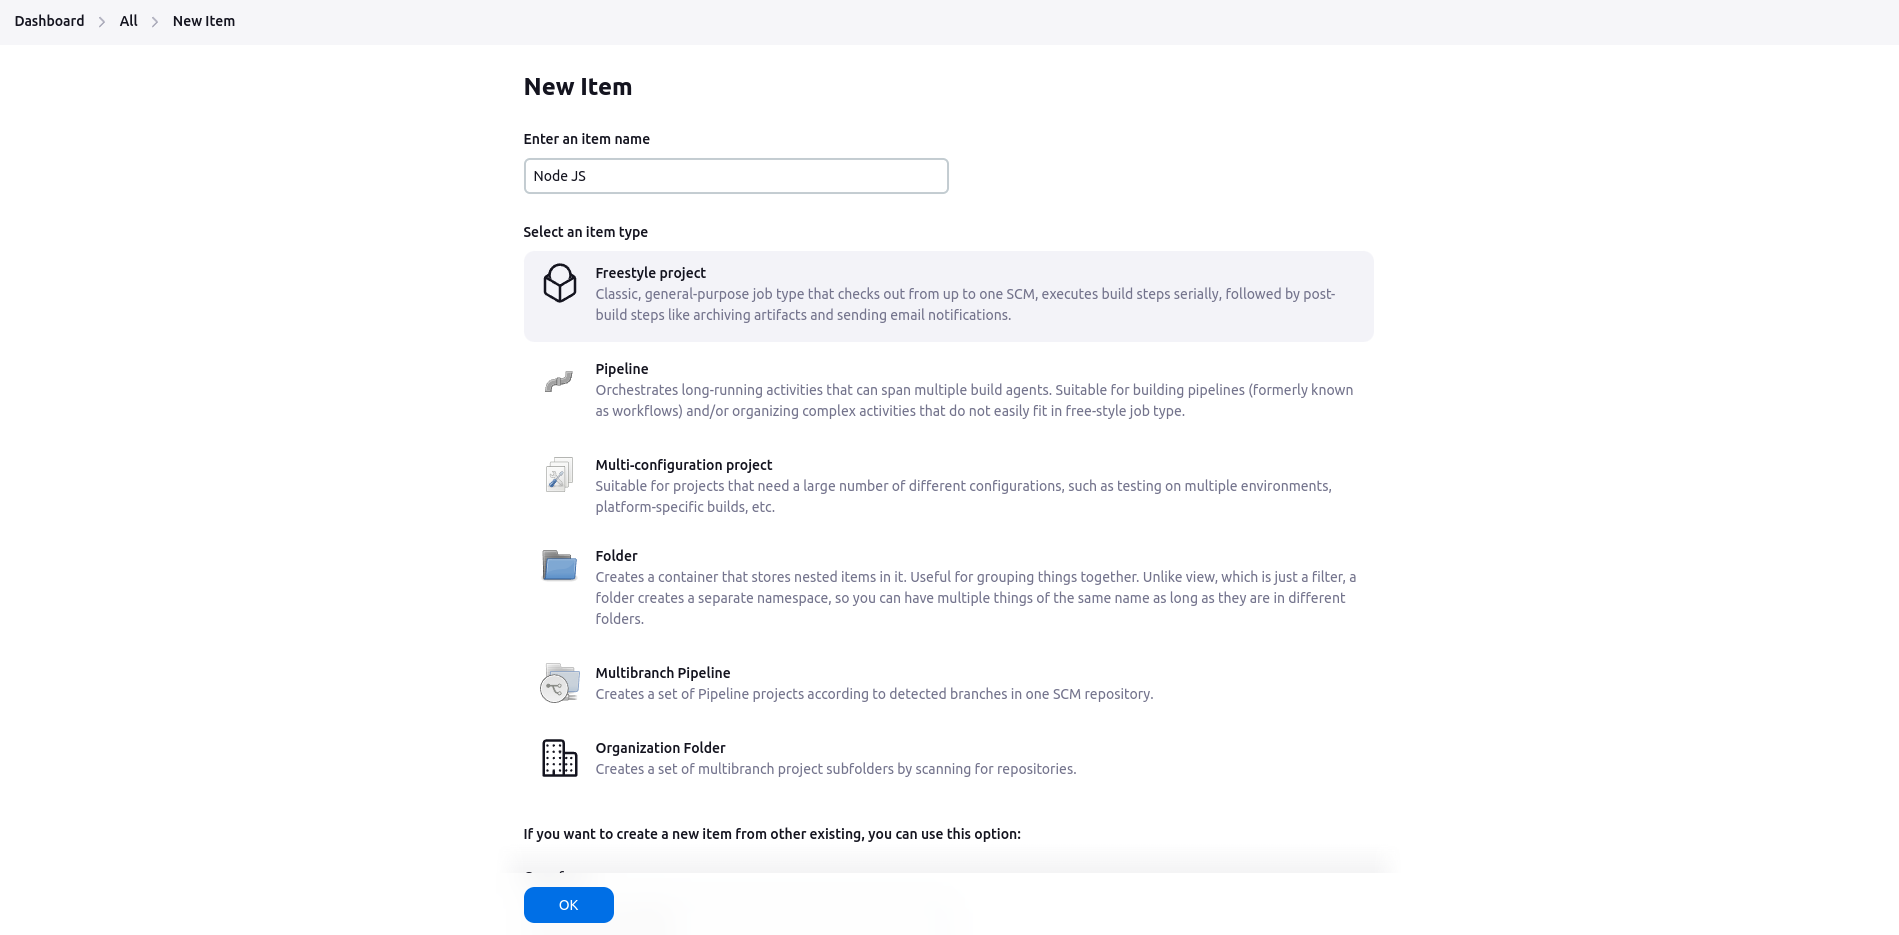
Click ok and continue.
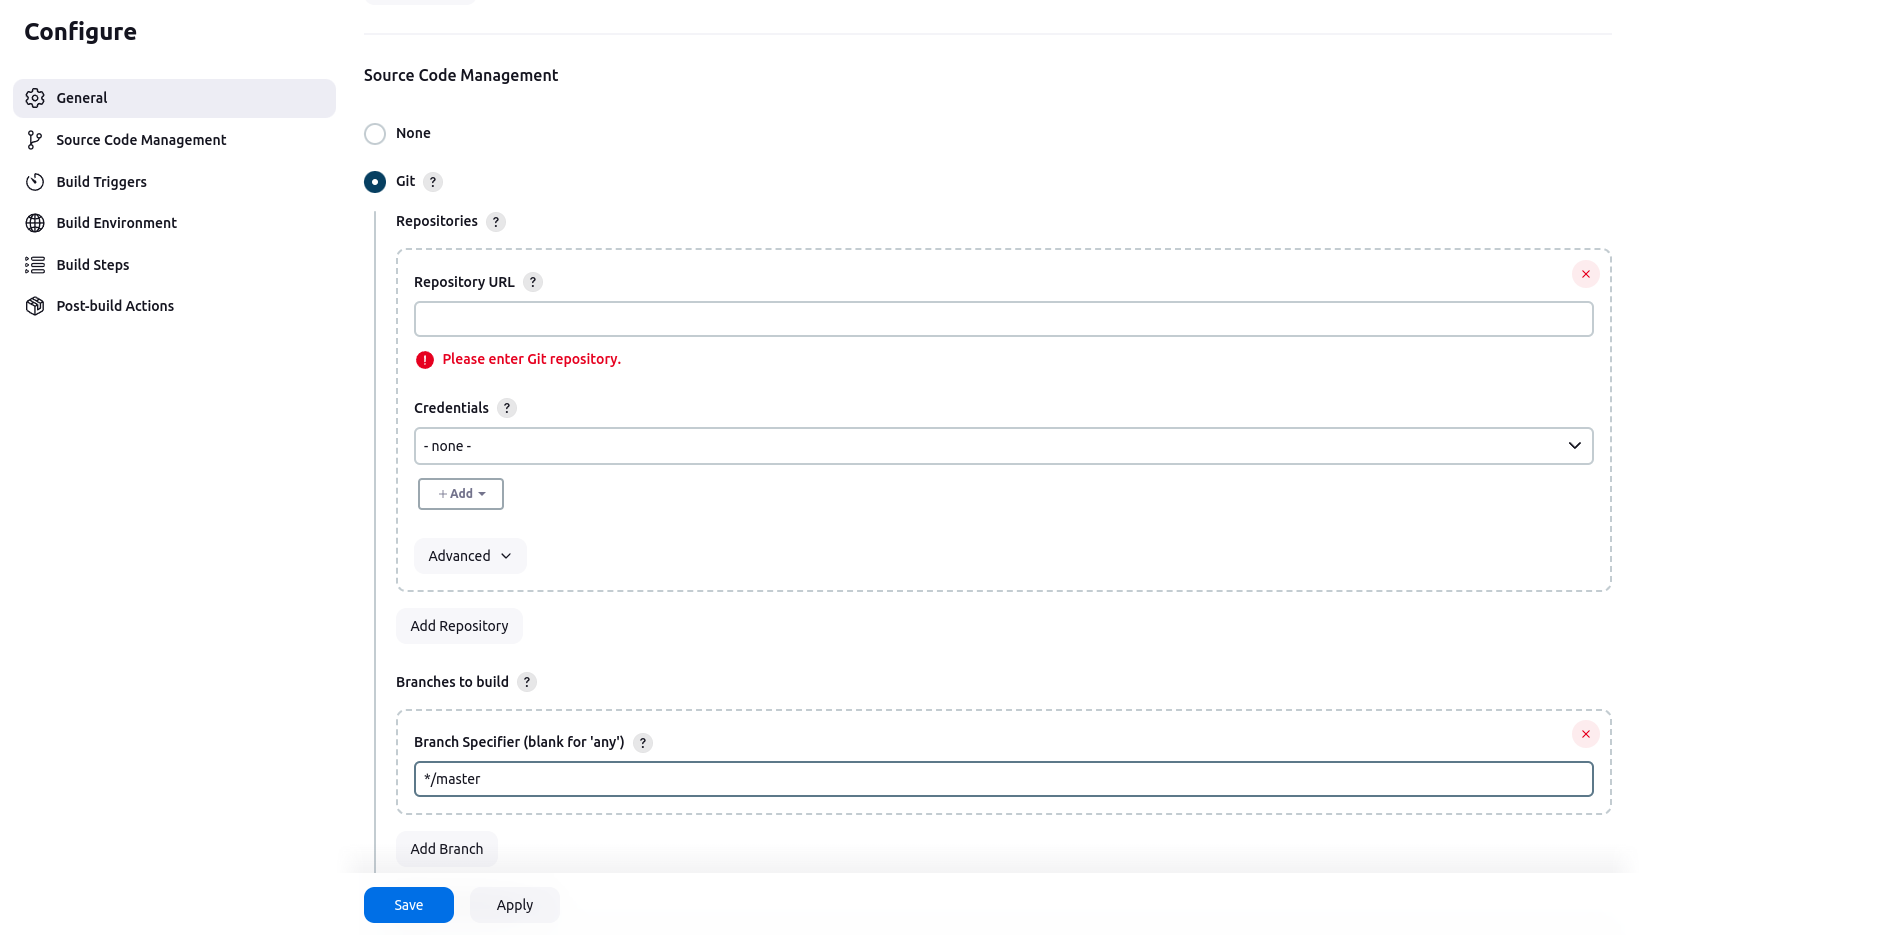
Choosing Source Code Management in Jenkins
Go to the Source Code Management section and select Git, here add the GitHub repo URL. GitHub has 2 types of repositories public and private, so we need to choose credentials accordingly.
- For Public GitHub Repo: No Credentials are needed, just add the repo. link
- For Private GitHub Repo: Need to add Credentials and select
Adding GitHub Access Token in Jenkins
Click on add> Jenkins a screen will pop up like this.
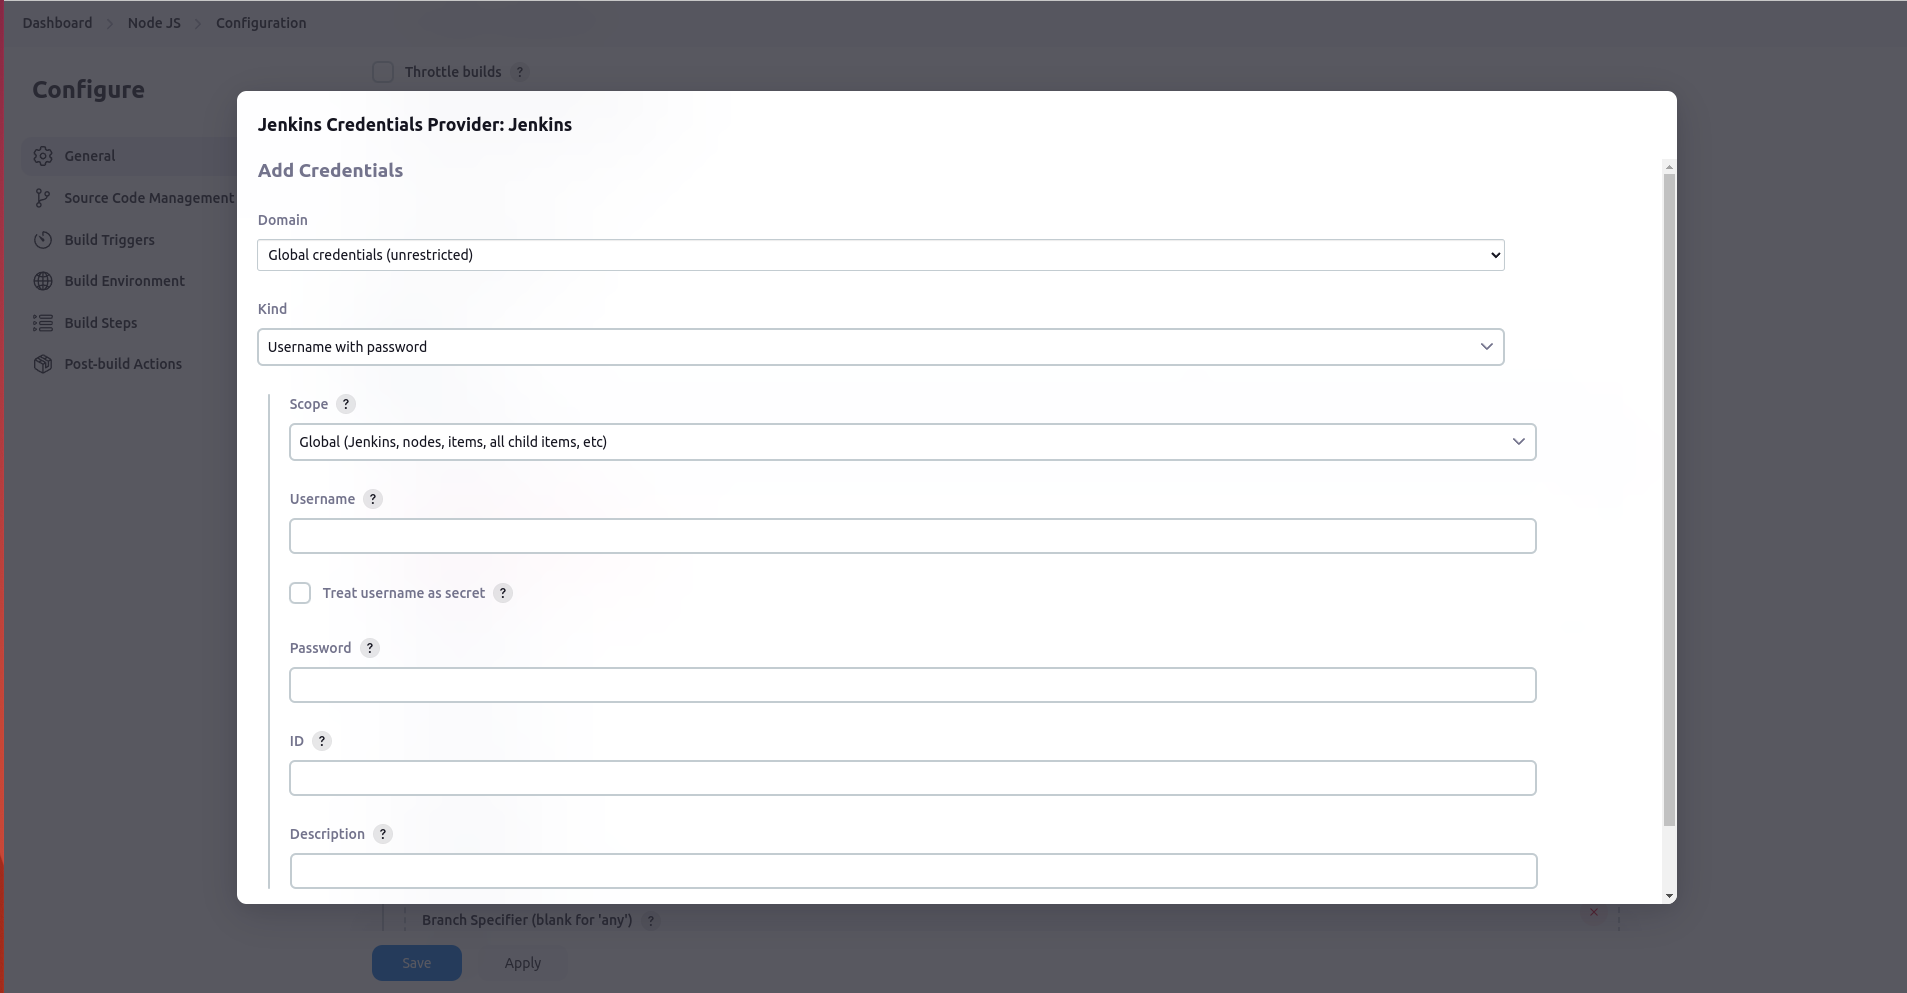
Select Kind: Username and password. then in place of the Username add your GitHub email and in place of the password add the Access token created previously. Then click save and select the credential from the dropdown for GitHub private repositories
Triggering Jenkins Builds
Now we have to write the code to copy the code from the GitHub to our application root directory and build and run code in the 3000 port. For this select the GitHub hook trigger for GITScm polling in the Build Triggers section and in Build Steps choose Execute Script
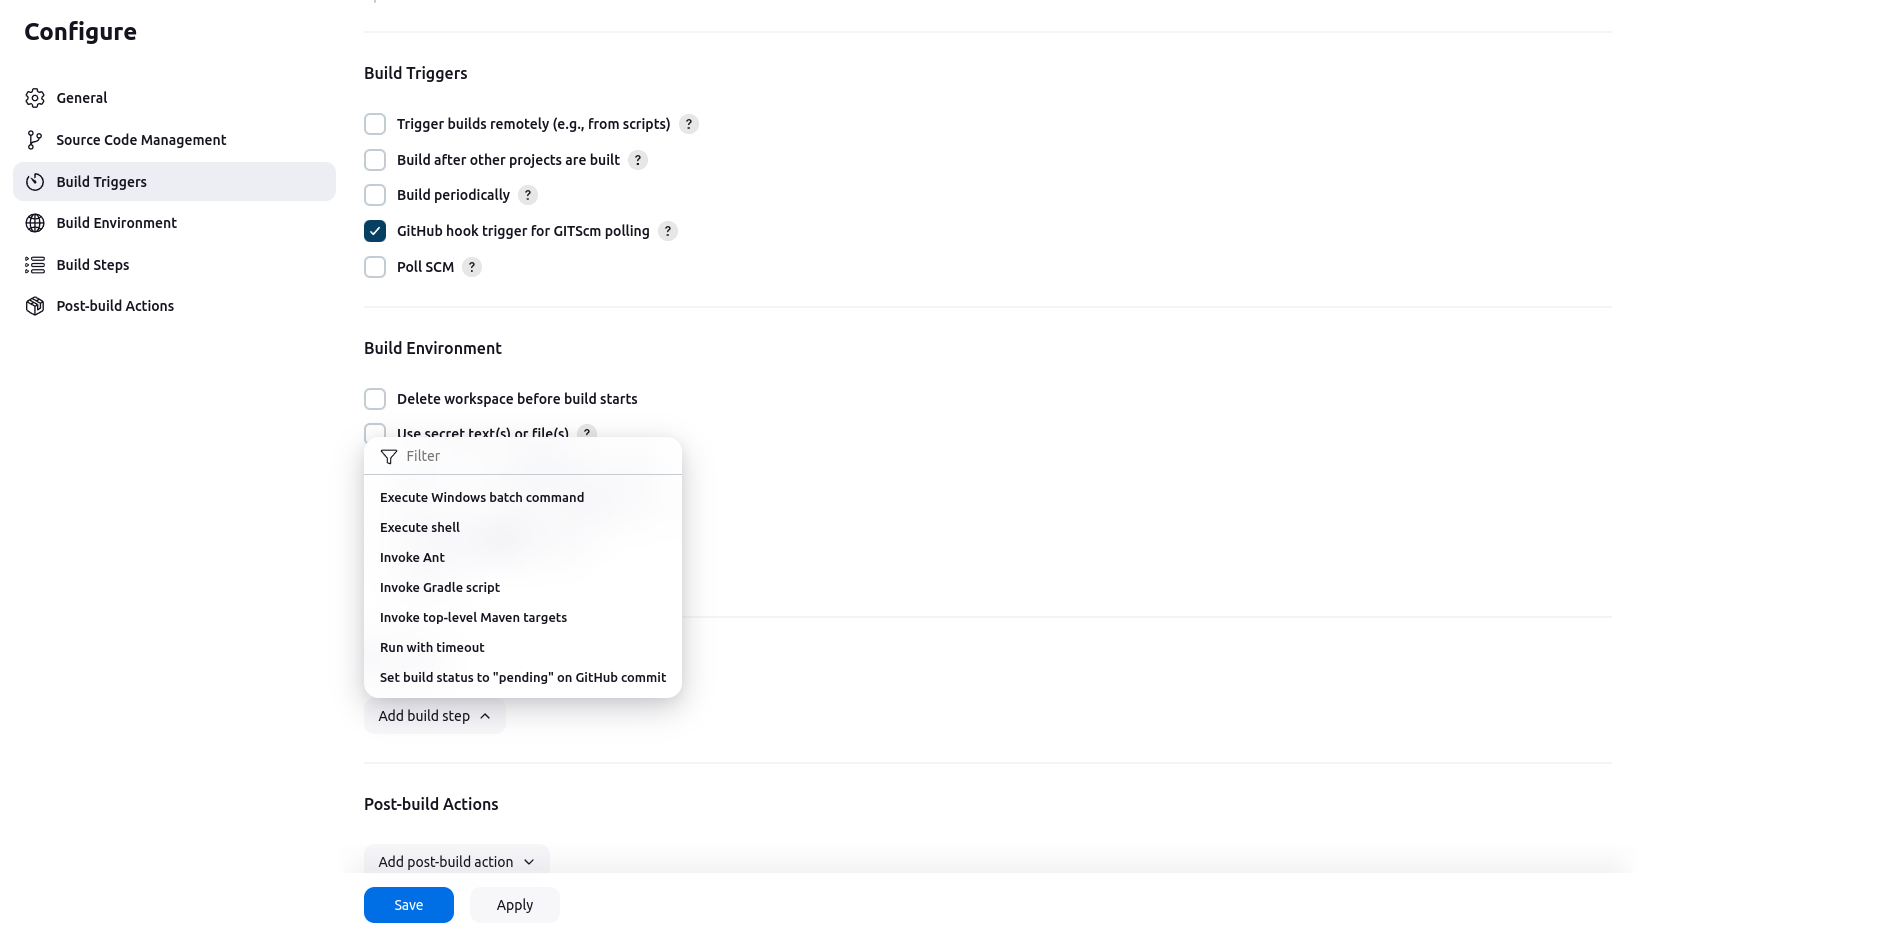
Then add these scrips in Execute script input and save the Job.
#!/bin/bash#!/bin/bash
sudo cp -r . /var/www/node-js-app/
cd /var/www/node-js-app/
sudo pm2 stop index.js
sudo pm2 delete index.js
sudo npm i
sudo pm2 start index.js --watch
Here my application is in the /var/www/node-js-app folder. Replace /var/www/node-js-app with your application root directory.
Once all things are done click on Build Now to trigger the first build. This will run your application in the port mentioned in the index.js file.